Coleman Power Steel Pool Manual: A Comprehensive Guide
This manual delivers essential safety guidelines‚ detailed setup procedures‚ and crucial maintenance advice for a fantastic‚ sparkling summer season with your Coleman Power Steel pool!
Welcome to the world of backyard fun! Your Coleman Power Steel Pool is designed for easy assembly and years of enjoyment. This manual serves as your comprehensive guide‚ ensuring a safe and refreshing swimming experience. Before you begin‚ carefully read all instructions and safety precautions.
Coleman Power Steel pools‚ including the Steel Pro Max series‚ offer a durable and affordable solution for summer relaxation. This guide covers everything from initial setup to ongoing maintenance and proper winterization. Understanding your pool’s components and following these instructions will maximize its lifespan and your enjoyment.
We’ll walk you through each step‚ from site preparation and frame assembly to liner installation and water balancing. Remember‚ safety is paramount – always prioritize following the provided guidelines. Get ready to dive into a summer filled with fun and create lasting memories with your new Coleman Power Steel Pool!

Understanding Your Pool Components
Familiarizing yourself with the parts of your Coleman Power Steel Pool is crucial for proper assembly and maintenance. The key components include the durable steel frame‚ providing robust support and stability. The heavy-duty liner creates a watertight basin for your swimming pleasure. A ground cloth protects the liner from punctures and abrasions.
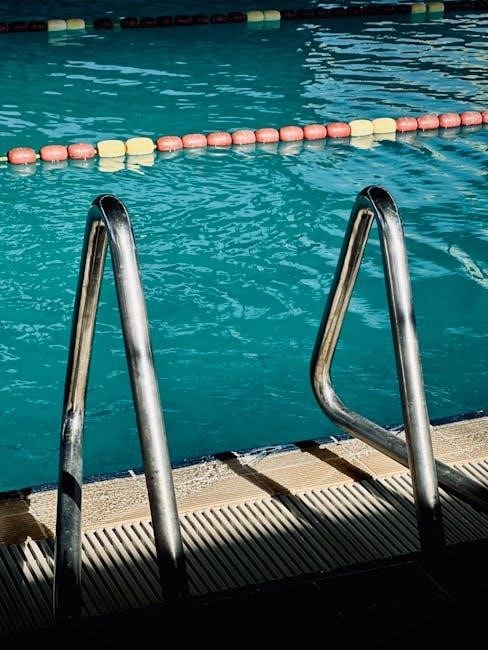
The pool system incorporates a pump and filter‚ essential for maintaining clean and clear water. Understanding their connection points and functions is vital. You’ll also find various fittings‚ valves‚ and hoses necessary for water circulation. Carefully inspect all components upon unboxing to ensure everything is present and undamaged.
This manual will reference these parts throughout the setup and maintenance sections. Knowing the names and functions of each component will simplify the process and help you troubleshoot any potential issues. Refer to the parts list included with your pool for a detailed diagram and identification of each item.
Pool Setup and Assembly
Proper assembly ensures a safe and enjoyable swimming experience! This section provides a detailed‚ step-by-step guide for installing your Coleman Power Steel Pool correctly.
Site Preparation: Choosing the Right Location
Selecting the ideal location is paramount for a successful and safe pool setup. Begin by identifying a firm‚ level surface – avoid soft lawns as they can compromise structural integrity. Ensure the chosen area is clear of any rocks‚ roots‚ or debris that could potentially damage the pool liner.
Consider proximity to electrical outlets for the pump and filter‚ but maintain a safe distance to prevent electrical hazards. Also‚ think about sunlight exposure; while warmth is desirable‚ excessive sun can accelerate chemical breakdown.
The site should be spacious enough to accommodate the pool’s dimensions‚ plus adequate space for walking around and accessing the equipment. Finally‚ check for underground utilities before digging or leveling the ground to avoid costly and dangerous mishaps. A properly prepared site is the foundation for a worry-free summer!
Ground Cloth Placement and Protection
Protecting your pool liner begins with proper ground cloth installation. Unfold the ground cloth carefully and lay it flat on the prepared site‚ ensuring it extends beyond the pool’s perimeter on all sides. This provides an extra layer of defense against punctures from unseen objects beneath the surface.
The ground cloth acts as a cushion and barrier‚ absorbing minor imperfections in the ground and preventing damage to the delicate liner material. Smooth out any wrinkles or folds in the cloth before proceeding with pool assembly.
It’s crucial to ensure the cloth is free of debris‚ as even small stones can cause tears. Consider using a separate protective layer‚ like a tarp‚ underneath the ground cloth for added security‚ especially on uneven terrain. A well-placed ground cloth significantly extends the life of your pool liner.
Frame Assembly: Step-by-Step Instructions
Begin by laying out all frame components and verifying you have all the necessary parts according to the parts list in your manual. Start assembling the base frame‚ connecting the side rails using the provided connectors – ensure they click securely into place.
Next‚ attach the uprights to the corners of the base frame‚ making sure they are oriented correctly. Gradually add the top rails‚ connecting them to the uprights and side rails‚ working your way around the pool.
Double-check all connections for tightness and stability as you progress. It’s vital to ensure the frame is perfectly level before proceeding to liner installation. A wobbly frame can lead to uneven water distribution and potential structural issues. Refer to the diagrams in your manual for visual guidance throughout the assembly process.
Liner Installation: Avoiding Wrinkles and Damage

Carefully unfold the pool liner and loosely lay it inside the assembled frame‚ ensuring it’s centered. Begin by covering the pool floor with approximately one to two inches of water. This helps to gently stretch the liner and allows for wrinkle removal.
Starting from the center of the pool‚ gently smooth out any wrinkles‚ working your way clockwise towards the outside edges. Avoid pulling or stretching the liner excessively‚ as this could cause damage.
As you add more water‚ continue smoothing out wrinkles. Small wrinkles may disappear as the liner warms up and expands. Avoid assembling the pool on soft lawn‚ as this can create uneven support and potentially damage the liner. Patience is key to a smooth‚ wrinkle-free installation!

Pool System Installation
Properly connect the pump and filter system‚ ensuring secure fittings and adherence to electrical safety guidelines for optimal water circulation and clarity.
Pump and Filter Connection
Connecting the pump and filter is a critical step in establishing a functional and clean pool system. Begin by carefully positioning the filter near the pool‚ ensuring easy access for maintenance. Attach the hoses securely to both the pump inlet and outlet‚ and the filter connections‚ utilizing hose clamps to prevent leaks.
Double-check all connections before proceeding‚ verifying that the pump is grounded correctly for electrical safety. Prime the pump according to the manufacturer’s instructions‚ which typically involves filling the pump housing with water to initiate suction. Once primed‚ cautiously turn on the pump to observe water flow through the filter.
Inspect for any leaks around the connections and address them immediately. A properly connected pump and filter system is essential for maintaining water quality and a safe swimming environment throughout the season. Remember to consult the specific diagrams within your Coleman Power Steel manual for precise hose routing and connection points.
Electrical Connections and Safety
Prioritizing electrical safety is paramount when installing your Coleman Power Steel Pool. Always engage a qualified electrician for all electrical work‚ ensuring compliance with local codes and regulations. Never attempt to make electrical connections yourself unless you are properly certified.
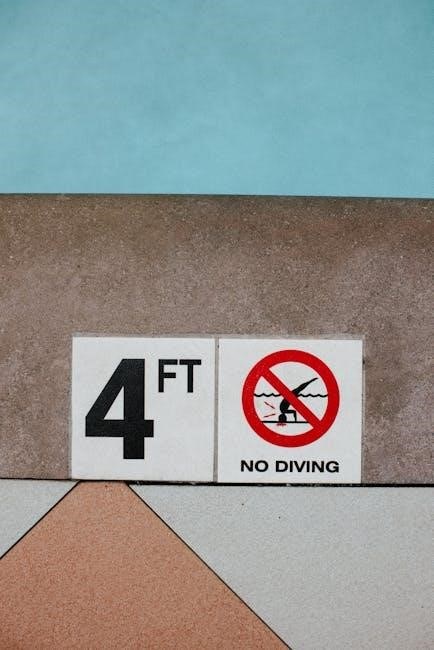
Utilize a Ground Fault Circuit Interrupter (GFCI) outlet specifically dedicated to the pool pump. This crucial safety device immediately cuts off power in the event of a ground fault‚ preventing electric shock. Ensure the outlet is located a safe distance from the pool‚ adhering to recommended clearances.
Inspect all electrical cords for damage before each use‚ and never operate the pump with a frayed or damaged cord. Keep electrical components dry and protected from the elements. Thoroughly read and understand all safety warnings in your manual before making any electrical connections‚ safeguarding against potential hazards.
Water Filling and Initial Balancing
Begin filling your Coleman Power Steel Pool slowly and carefully‚ ensuring the liner settles evenly as the water level rises. Initially‚ add just 1-2 inches of water to cover the pool floor‚ gently smoothing out any wrinkles from the center outwards in a clockwise motion. This prevents stress on the liner during the full filling process.
Continue filling until the pool reaches approximately 90% capacity. Before completely filling‚ test the water’s chemical balance. Use a reliable test kit to measure pH‚ alkalinity‚ and chlorine levels. Adjust these levels according to the manufacturer’s recommendations to establish a safe and comfortable swimming environment.
Proper water balancing prevents corrosion‚ scaling‚ and algae growth. Once balanced‚ complete the filling process and allow the system to circulate for at least 24 hours before swimming‚ ensuring thorough chemical distribution and optimal water quality.

Pool Maintenance and Care
Regular cleaning‚ water chemistry checks‚ and diligent filter maintenance are vital for a sparkling‚ safe‚ and enjoyable swimming experience with your Coleman Power Steel Pool!
Regular Cleaning Procedures
Maintaining a clean pool is paramount for a healthy and enjoyable swimming experience. Begin by skimming the water’s surface daily to remove leaves‚ insects‚ and other debris. This prevents them from sinking and decomposing‚ impacting water quality.
Vacuum the pool floor at least once a week‚ or more frequently if needed‚ to remove settled dirt and algae. Utilize a manual vacuum connected to the skimmer or a robotic pool cleaner for efficient cleaning. Brush the pool walls and floor regularly – ideally twice weekly – to dislodge algae and prevent buildup.
Pay close attention to areas with reduced circulation. Empty the skimmer basket and pump strainer basket frequently to ensure optimal water flow. A clean pool is a happy pool‚ extending the life of your equipment and ensuring a safe‚ refreshing swim!
Water Chemistry: Testing and Adjustment
Maintaining proper water chemistry is crucial for swimmer comfort‚ equipment protection‚ and water clarity. Regularly test your pool water – ideally 2-3 times per week – using a reliable test kit or strips. Key parameters to monitor include pH‚ alkalinity‚ and sanitizer levels (chlorine or bromine).
pH should be maintained between 7.2 and 7.8. Low pH can cause corrosion‚ while high pH reduces sanitizer effectiveness. Alkalinity acts as a pH buffer and should be between 80 and 120 ppm. Adjust these levels using pH increaser/decreaser and alkalinity increaser as needed.
Maintain appropriate sanitizer levels according to the product instructions. Shock the pool weekly to oxidize contaminants and boost sanitizer effectiveness. Consistent water chemistry ensures a safe‚ healthy‚ and enjoyable swimming environment.
Filter Maintenance and Replacement
Regular filter maintenance is vital for optimal pool performance and water clarity. Backwashing (for sand and DE filters) should be performed when the pressure gauge reads 8-10 psi higher than the clean starting pressure. Cartridge filters require rinsing with a garden hose to remove debris; a chemical filter cleaner can be used periodically for a deeper clean.
Inspect filter cartridges for tears or damage and replace them when necessary – typically every 1-3 seasons‚ depending on usage. Sand filters require sand replacement every 5-7 years. DE filters need replenishment of diatomaceous earth after each backwash.
A clean filter ensures efficient water circulation and prevents strain on the pump. Following the manufacturer’s recommendations for cleaning and replacement will extend the life of your filter and maintain pristine pool water.

Troubleshooting Common Issues
This section addresses leaks‚ pump malfunctions‚ and filter problems‚ providing solutions to keep your Coleman Power Steel pool running smoothly and safely all season long.
Addressing Leaks and Damage
Detecting a leak requires careful inspection of all connections‚ the liner‚ and the pool frame. Begin by visually examining the pump‚ filter‚ and hose connections for any drips or moisture. If the leak is in the liner‚ carefully mark the location and consider using a liner repair kit‚ readily available at most pool supply stores.
For frame damage‚ assess the extent of the issue. Minor bends might be manageable‚ but significant damage necessitates replacement parts to ensure structural integrity. Always disconnect power before attempting any repairs. Regularly smoothing out wrinkles in the liner can prevent stress points that lead to tears. Remember‚ preventative maintenance is key to avoiding costly repairs and extending the life of your Coleman Power Steel Pool. Prioritize safety and consult a professional if you are unsure about any repair process.
Pump and Filter Malfunctions
If your pump fails to start‚ first check the power supply and ensure the outlet is functioning correctly. Verify the filter is clean and not clogged‚ as this can strain the pump motor. A tripped circuit breaker is another common culprit – reset it if necessary. For filter issues‚ a drop in water pressure often indicates a dirty filter cartridge or sand bed.
Regular cleaning‚ as outlined in the maintenance section‚ is crucial. If the filter remains clogged after cleaning‚ it may require replacement. Unusual noises from the pump could signal air in the system or a failing impeller. Always disconnect power before inspecting or servicing the pump. Consult the troubleshooting section of your manual or a qualified pool technician for more complex issues. Ignoring these malfunctions can lead to further damage and costly repairs.
Winterizing Your Coleman Power Steel Pool

Proper winterization is vital to protect your Coleman Power Steel Pool from freezing temperatures and potential damage. Begin by thoroughly cleaning the pool and balancing the water chemistry. Lower the water level below the skimmer opening‚ but above the return jets. Drain all remaining water from the pump‚ filter‚ heater (if applicable)‚ and all associated plumbing lines to prevent cracking.
Disconnect all hoses and store them indoors. Remove the filter cartridge or sand and store it properly. Cover the pool with a winter cover‚ securing it tightly to prevent debris accumulation. Consider using an air pillow to absorb ice expansion. Regularly check the cover throughout the winter and remove any accumulated water or snow. Following these steps will ensure a smooth and trouble-free opening next spring!